Pages

Monday, 4 February 2013

What to do with old cards...

Now, some of you who know me, know that I am quite a sentimental person and keep hold of useless items that hold special memories, like cinema tickets, train tickets etc and I often keep all my birthday and Christmas cards. 

Now this habit has started to a little bit annoy my husband, as I am a bit of a clutter maker, so to keep him happy and the house tidy, I've decided to use my cards creatively.

Idea #1 - Gift tags
Last Christmas especially was quite tight money-wise for us, so instead of buying gift tags that will end up in the bin anyway, I decided to turn some of my old Christmas cards into tags, using a hole puncher to make a hole in the corner, some fancy pinking scissors to cut a funky edge around the tag, and those little ribbon tags you find in clothes that either itch you or end up sticking out from under your armpits.

Idea #2 - Cheap way to decorate
Sometimes it's expensive to buy pictures to decorate your room with. I have a lot of birthday cards that are just pictures on the front and since they were pretty enough to hang up on the wall that is exactly what I did.
I asked around for old photo or picture frames people didn't want anymore (you can also check out charity shops and just get rid of the naff picture but keep the frame) and put my cards inside the frames.


This one was a birthday card from 2 years from a friend who appreciate pretty pictures like me :) This is now hung up in the bathroom opposite the toilet, so when you're doing your business, you can look onto a lovely beach  scene :D


This is another birthday card from 2 years ago. I've hung this one up in the kitchen. I have loads of cards that have cupcakes on them, so I'm hoping to find more frames and have a cluster of them on the wall.
I love to bake so these definitely need to be in the kitchen!


This one is a Christmas card my husband and I got from a friend last year. She illustrated it herself and I found it too pretty to throw away, so it's now in a frame standing pride of place on the mantel piece in the front room.

Monday, 14 January 2013

Operation Front Room! Upholstering chairs

Recently we have had the front room repainted after we had insulation put in, and today I've hung up the curtains again and started to re-upholster the chairs.

The chairs came with the house and were probably as horrible to look at brand new as they do now that they're old!

I used material I was given for free by a lady I know from Church after I got locked out of my house one time (sometimes there are advantages to locking yourself out!)

I bought some upholstery nails from Wilko's for 99p a packet, with approx 25 in each, so with free chairs and material, it has cost me under £2.00 to make the chair look better.

 So here is a comparison between the two chairs. The yucky brown chair on the right is how they originally looked like and on the left is my effort to make them look better.

I used trial and error to attach the cloth onto the chair, it's really messy underneath, but who's going to look under there?!

Thursday, 10 January 2013

Operation Front Room!

I've been living in a rented house for over a year now, and I haven't really done a lot to it to make it feel more homely as I wasn't sure how long I was going to stay here.

Recently we have had insulation work done. Because we don't have cavity walls, they had to attached 90mm foam boards to the inside of the house at the front, and onto the outside of the house at the back. This means the walls of the front room and front bedroom are now an extra 9 cm thick and are now a different colour to the rest of the house.

Our landlady has organised a decorator to come in and repaint the walls, and this has spurred me on to actually make the house more like a home.

The front room currently is the spare bedroom for guests and is used as my husband's computer room, so I've decided to claim the front room as my own, to store all my sewing and craft things that are currently taking over the living room.

 At the moment, the front room is being used as a storage space. It's a very small room dominated by a massive fire place and a huge cupboard/shelving unit, and it can get very cold, so hopefully the insulation will make a difference.

One of the other reasons I want to start using the front room, apart from storing my craft and knitting things, is to use it as my office. I have always wanted to write a novel, and I have had an idea for a story for the past 4 years but unfortunately I think finding things to distract myself. The living room is too comfortable with a sofa and tv, so I thought if I had a space dedicated to just writing and being creative, it might help me to be more disciplined.


I have made a small start on the room by changing the curtains. The previous curtains were thin and a beige colour, so not very inspiring , so I change them for cream ones with blue/green poppies on them. They were £9.99 from Home Bargains and they match the carpet really well.


I have also started re-upholstering some of the chairs that came with the house, as we can't afford new chairs. I had some material left over from a door curtain I made and cut out a square to re-cover the chair.

To attach the material, I must admit, was a bit of a botch job, using things I could find around the house. So I used a mixture of drawing pins and small nails, but it works so I'm not complaining :)


So this is now my project to keep me occupied while looking for a job at the same time. I will try to update this more regularly than I have done before and hopefully there are ideas here that you can use too!


Wednesday, 12 December 2012

Memory Blanket

At the moment I have the builders round to put in some insulation, which means I have to be in the house to let them in. Yesterday they switched off the gas for a while, which I annoyed me a bit as I wanted to make some mince pies, so I had to find something else to occupy myself.

I've had an idea for a couple of weeks to make a blanket, but each square would represent each year Spence and I have been married. This has now evolved into a Memory Blanket,as I would get too impatient waiting for our next anniversary to knit a square. I managed to create my own pattern and knit the square in one day and I was really pleased with the result.

I do hope that this blanket will grow and be filled with happy memories and that it will be used and cherished by future generations. It will be a picture story telling the life of our little family.

I will update the blog with new squares when I make them, and you can watch the blanket grow :) and hopefully it will encourage you to create your own, whether knitted like mine or maybe even a scrapbook.


The red square is the day Spence and I got married and the Snowflake square represents our first Christmas together as Mr and Mrs.

Wednesday, 31 October 2012

My New Shop

I'm aware I haven't written on my blog for such a long time, that is because I have been a very busy bee :)

I have started a little business called J'adorele back in September and that has had most of my attention. I make knitted items such as hats, scarves, and blankets and hand sewn items like my t-shirt cushion covers and Christmas Stockings.

At the moment I do have a sale on. 10% off all items listed on my etsy shop and 30% off all custom orders and free delivery. I also have a facebook page and a twitter account so please check them out!


Monday, 3 September 2012

My New Draft Excluder


Because of subsidence of the ground (I don't know when it happened, it was before I moved in) there is a massive gap between the kitchen floor and the bottom of the door and on really cold nights, you can feel the cold air coming through. So I decided to make a draft excluder to try keep the cold out.

If you want to make your own this is how I made mine.


  • 4mm knitting needles (size 8)
  • odd balls of wool in the colours of your choice - I used cream, white brown and red as those are the colours in the room
  • stuffing - I used rags left over from tshirts I made into cushion covers. You could use old clothing and cut into pieces for stuffing.
  • Wool sewing needle - if you don't have one, use a large strong sewing needle.

Measure the bottom edge of your door and make the length of your draft excluder a inch or two longer than the door measurement. My excluder is 33 inches.

Cast on 50 stitches and knit in stripes. I alternated between garter stitch and stocking stitch on each stripe, so a cream stripe is all garter stitch then the red stripe is stocking stitch and so on.

When your draft excluder is the length you want, cast off and join the edges using blanket stitch using the wool needle and fill it with the choice of your filling as you go along.

this link shows you how to do a blanket stitch http://www.cherrymenlove.com/crafts-how-tos/2009/11/how-to-sew-blanket-stitch.html

thanks for reading!

Thursday, 12 July 2012

T-shirt Cushion

I have loads of old clothes that I find hard to throw away as they have sentimental value or are just too pretty to get rid of. So I decided to make some into cushion covers.

The instructions will fit a cushion pad size 18 x 18 inches.

1) First select your tshirt/item of clothing.


2) unpick or cut along the hem and side seams so it looks like an apron.


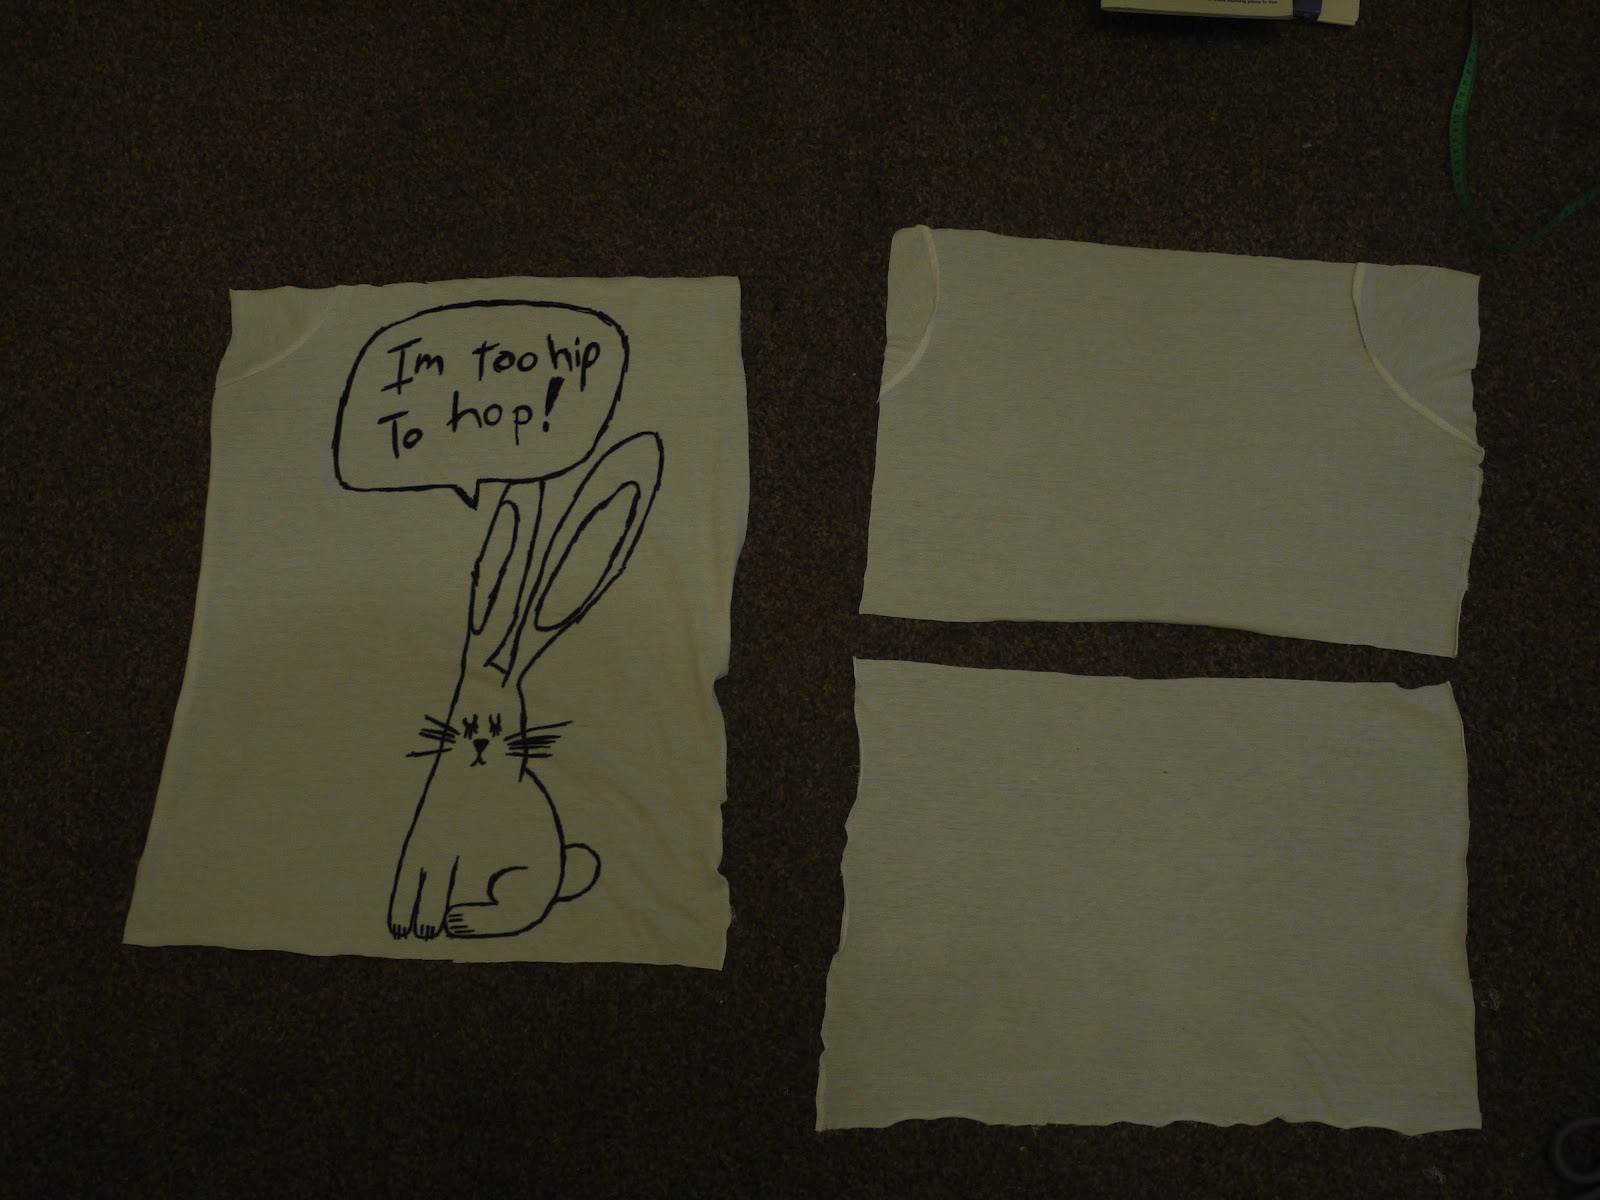
3) Cut out a 20 x 20 inch piece of the front piece and two 20 x 12 inch pieces for the back of the cushion. (However mine in the photo turned out rectangular by accident!)


4) with the two back pieces, hem one end of each.


5) when you have finished hemming the back pieces, place the t shirt front on the floor with the right (front) side facing you. Then place the back pieces on top with the wrong side facing you (you're making the cushion cover inside out). The back pieces should overlap.
 Pin together and sew either by hand or with a sewing machine. When finished, remove pins, turn it the right way out and you have a cushion!

you can do this pattern with other clothes than just t-shirts. For ideas add buttons, ribbons and patches to make your cushion unique.